Written Guide
To get started with the integration, you will need: :
1. A GoHighLevel account
2. A InCharge account
The setup flow
1. Adding InCharge tracking code to your funnel
2. Injecting the Incharge click id into your form's hidden parameters
3. Creating a webhook
Step 1: in GoHighLevel
- Choose the relevant form under sites ->
- Forms
- Click edit
- Add a custom field

Add a Custom Field called incharge_cid

Step 2: Choose single line text input field
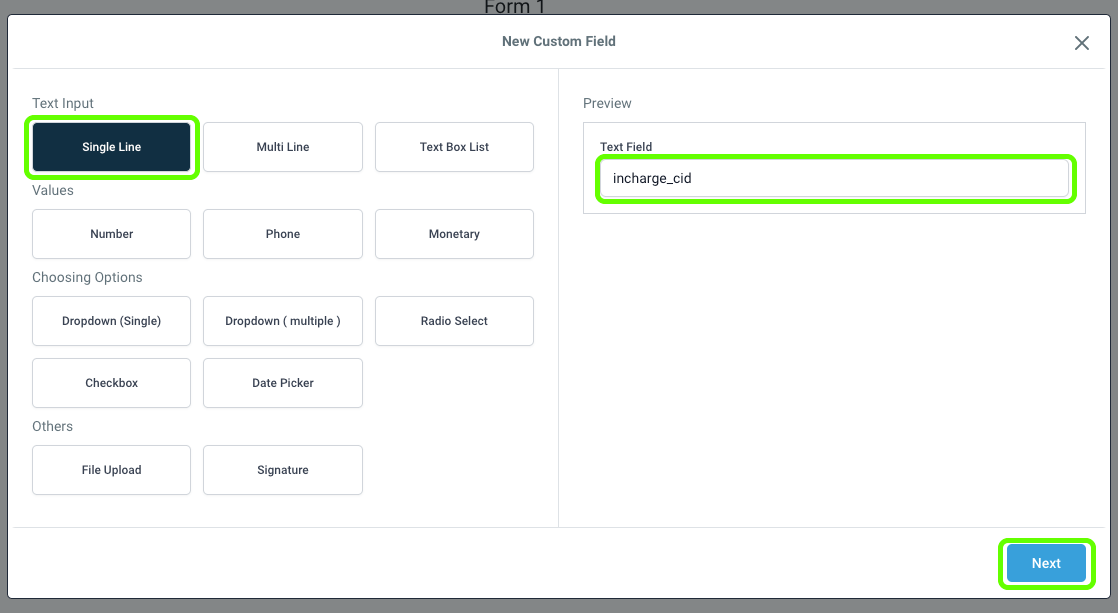
Step 3: Click Next
Step 4 : Input the following fields
- Name of Field = incharge_cid
- Placeholder = incharge_cid
- Type = Contact
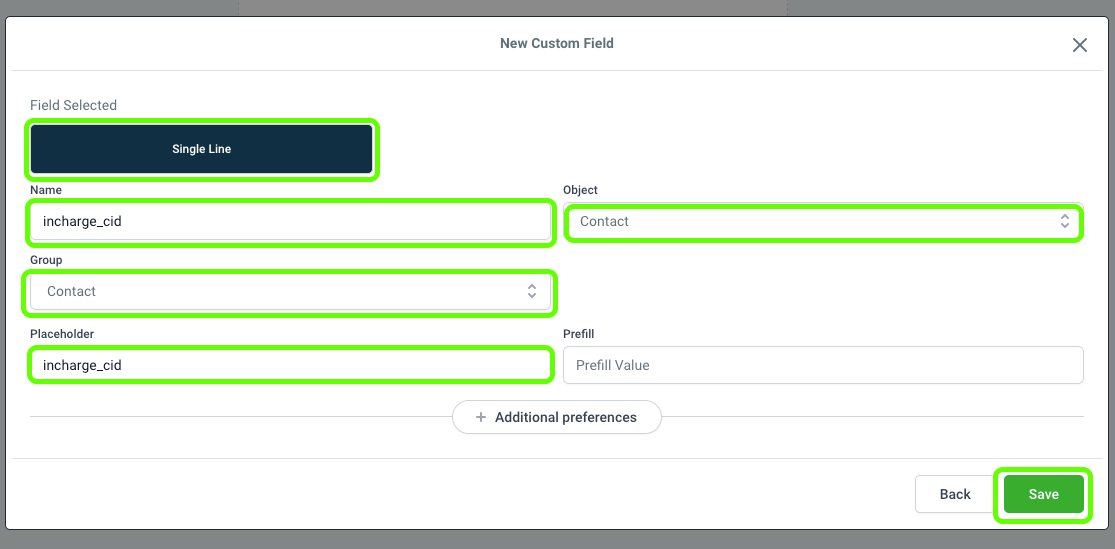
Step 5 : Click Save
Step 6 : Drag the incharge_cid field onto your form
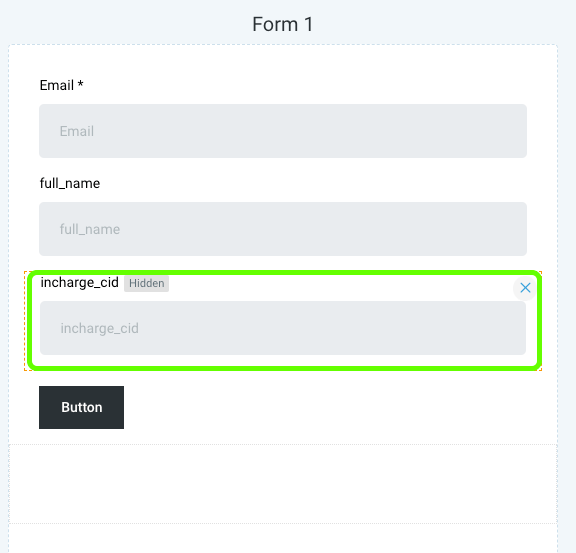
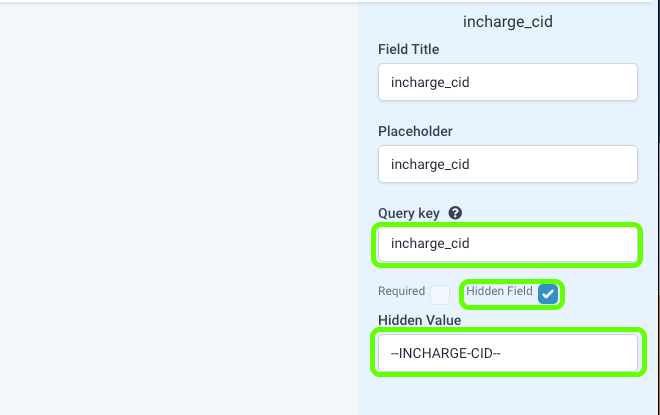
Step 7 : Click on the incharge_cid field and mark it as a hidden field, and fill in the query parameter field as incharge_cid and fill the Hidden Value as --INCHARGE-CID--
Step 8 : Now let's add the tracking code to your funnel
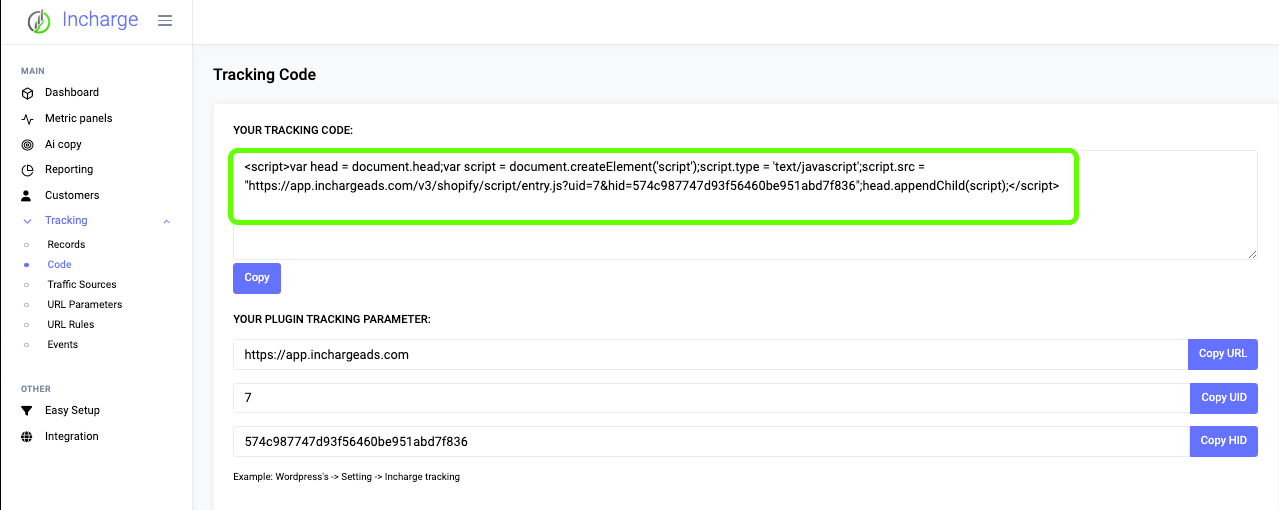
Step 9 : Go to your InCharge account and navigate to Tracking > Code and copy the code at the top
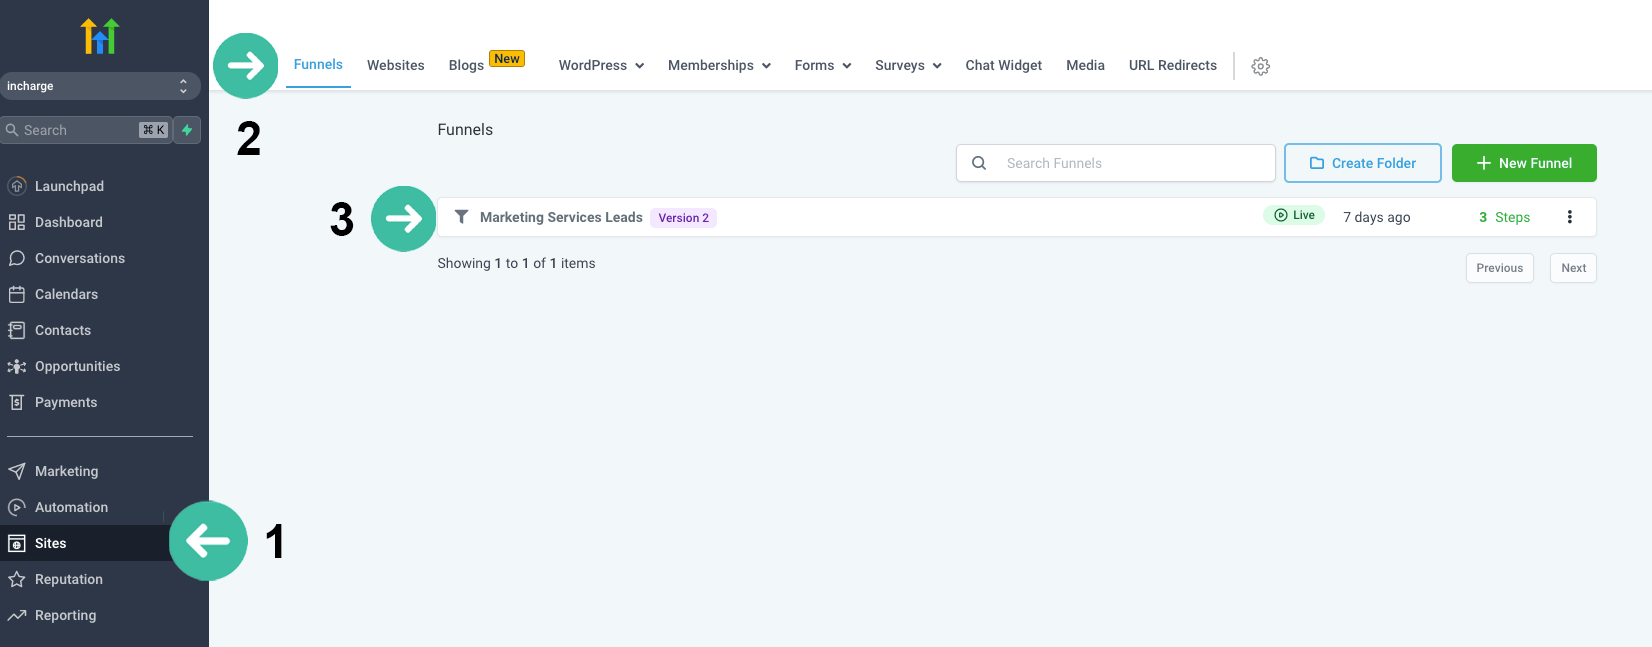
Step 10 : Go back to GoHighLevel and click on sites and choose a relevant funnel
Step 11 : Click on the settings tab and paste in your InCharge tracking code into the header script
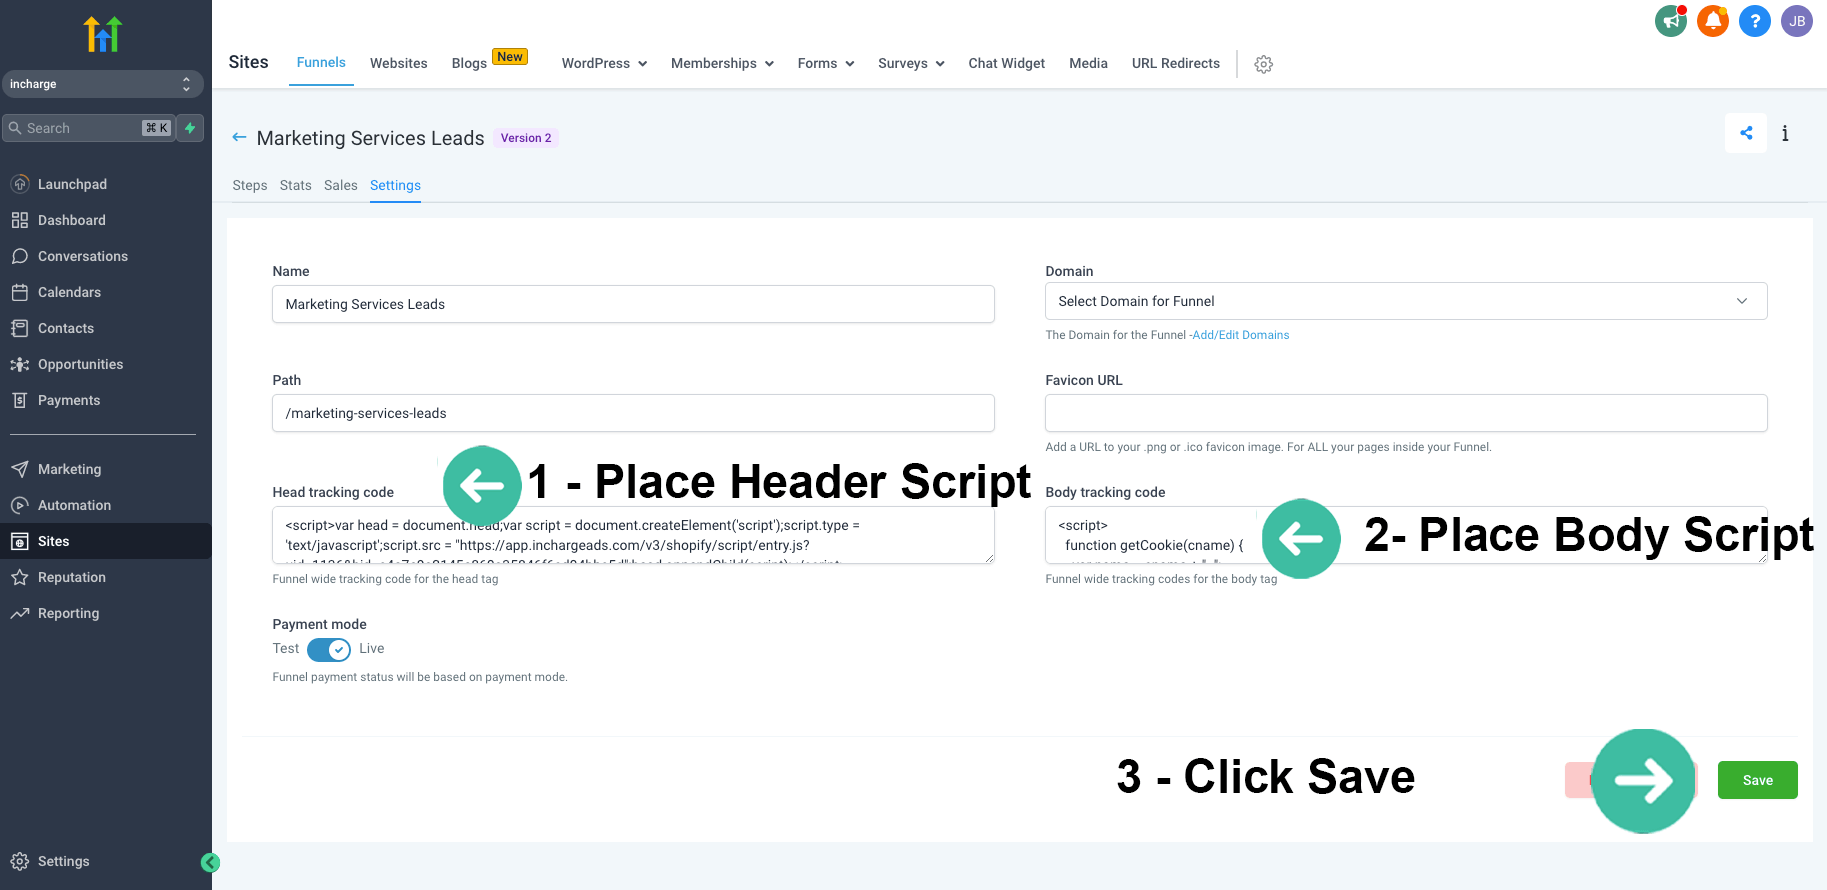
Step 12 : Copy the below script and paste it into the body script and click save
<script>
function getCookie(cname) {
var name = cname + "=";
var ca = document.cookie.split(';');
for(var i = 0; i < ca.length; i++) {
var c = ca[i];
while (c.charAt(0) == ' ') {
c = c.substring(1);
}
if (c.indexOf(name) == 0) {
var cid = c.substring(name.length, c.length);
return cid;
}
}
return "";
} var cid = getCookie("__cid");
var currentUrl = window.location.href;
if(currentUrl.indexOf("incharge_cid=") == -1) {
if (currentUrl.indexOf("?") == -1) {
var newUrl = currentUrl + "?incharge_cid=" + cid;
} else {
var newUrl = currentUrl + "&incharge_cid=" + cid;
}
history.replaceState({}, "", newUrl);
}
</script>
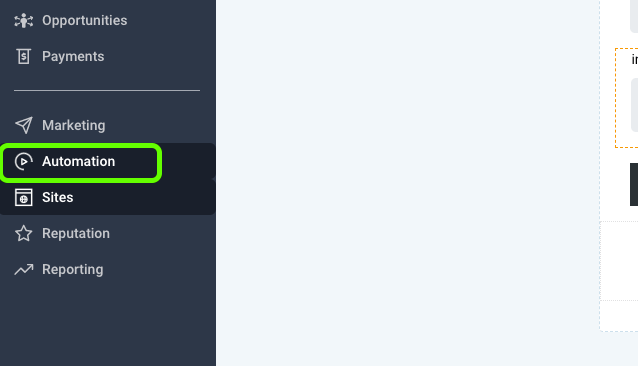
Step 13 : Now let's connect your webhook by going to the Automation section
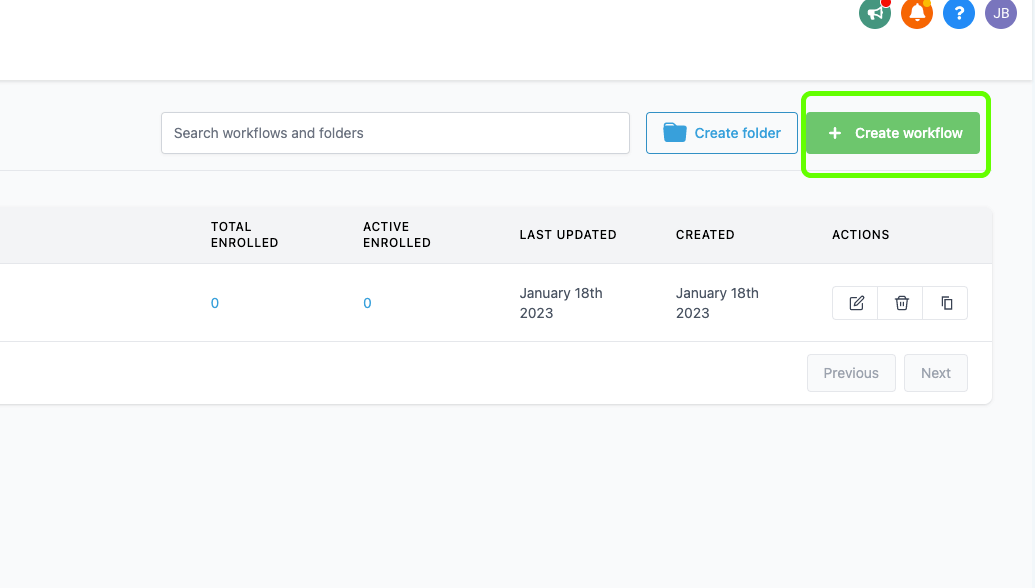
Step 14 : Click on Create Workflow, and start template from scratch
Step 15 : Configure your trigger (You may use different triggers)
- You may use the "form submit" trigger or any other trigger you. prefer
Step 16 : Click to create a action > webhook

Step 17 : Configure webhook
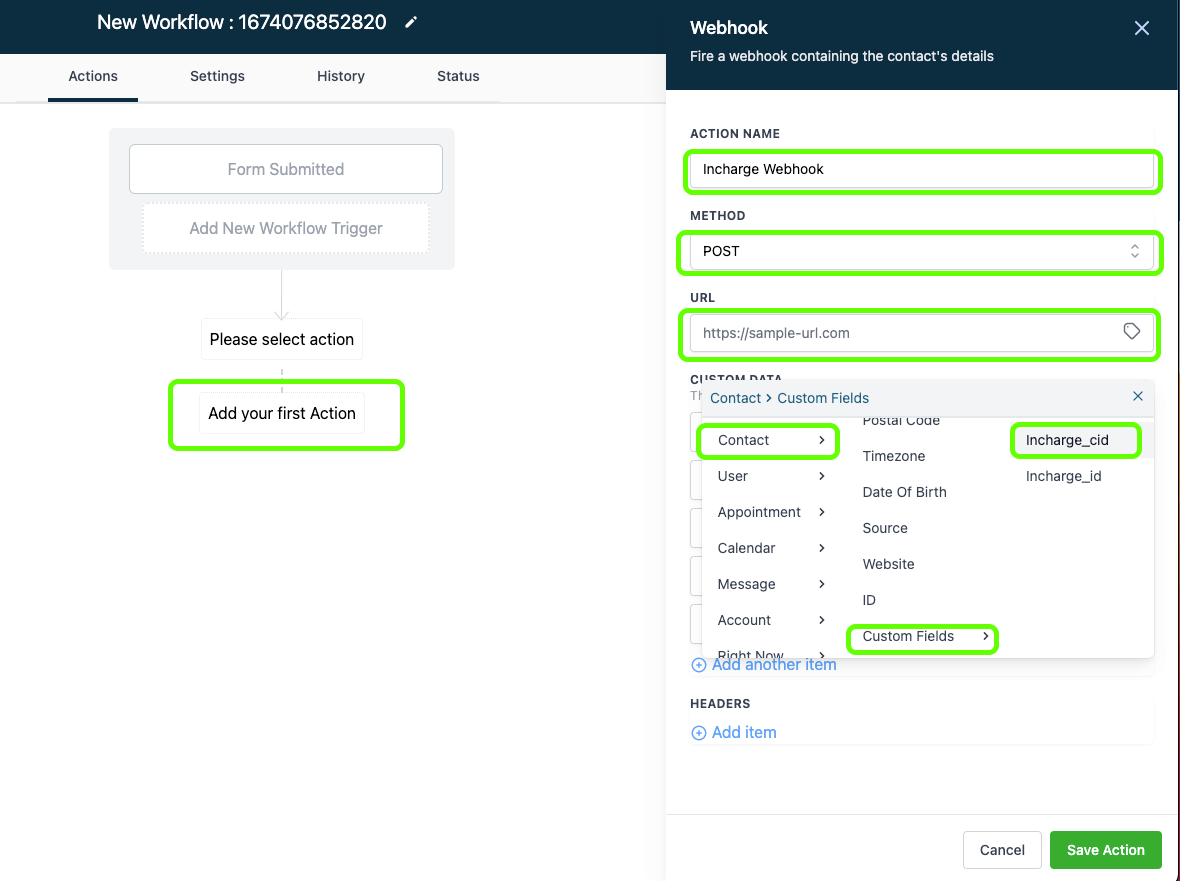
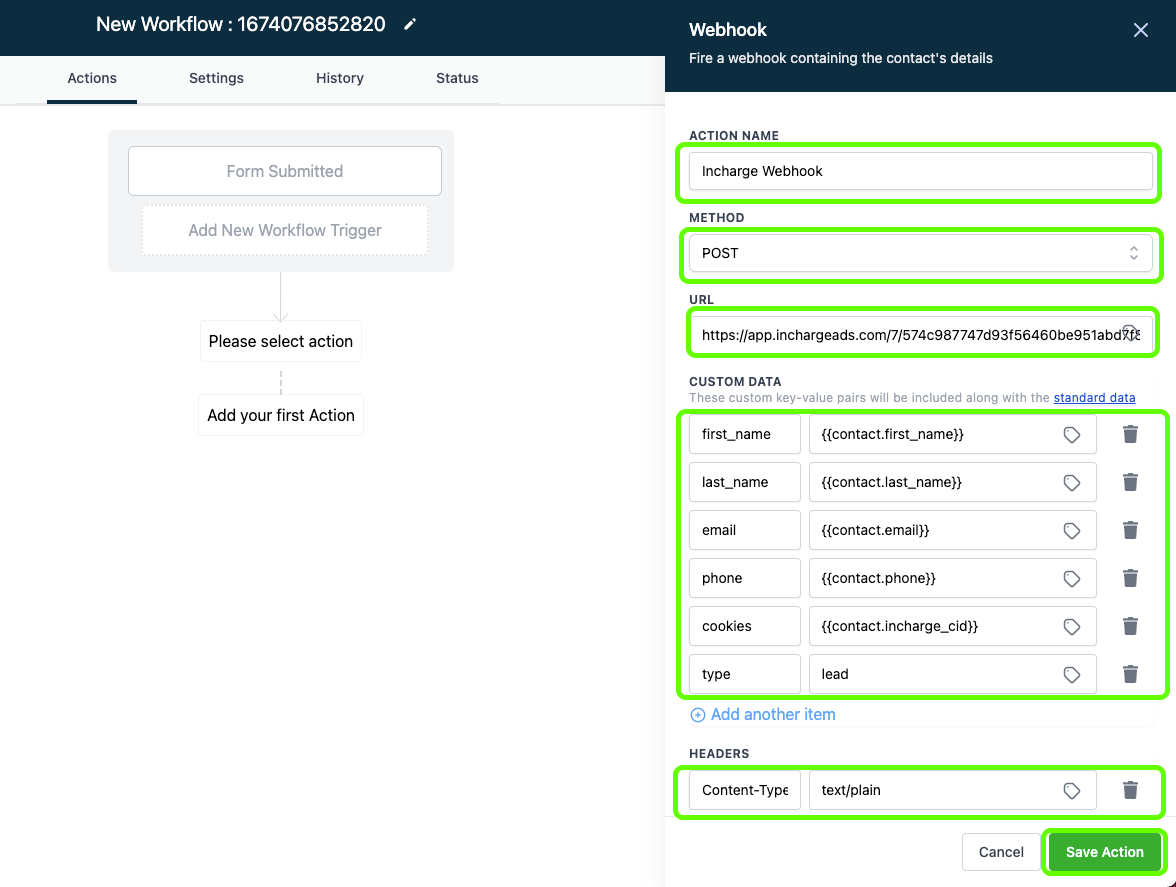
- Action Name = Incharge Webhook
- Method = Post
Code the url below, and replace the [UID] and [HID] values from Incharge Tracking > Code
- URL = https://app.inchargeads.com/[UID]/[HID]

Next add the custom data parameters
- first_name = {{contact.first_name}}. | (optional)
- last_name = {{contact.last_name}}. | (optional)
- email = {{contact.email}}. | (required)
- phone = {{contact.phone}}. | (optional)
- cookies = {{contact.incharge_cid}}. | (required)
- type = lead . | (required)("registration" may also be used instead of lead)
Next add the headers
- Content-Type = text/plain. | (required)
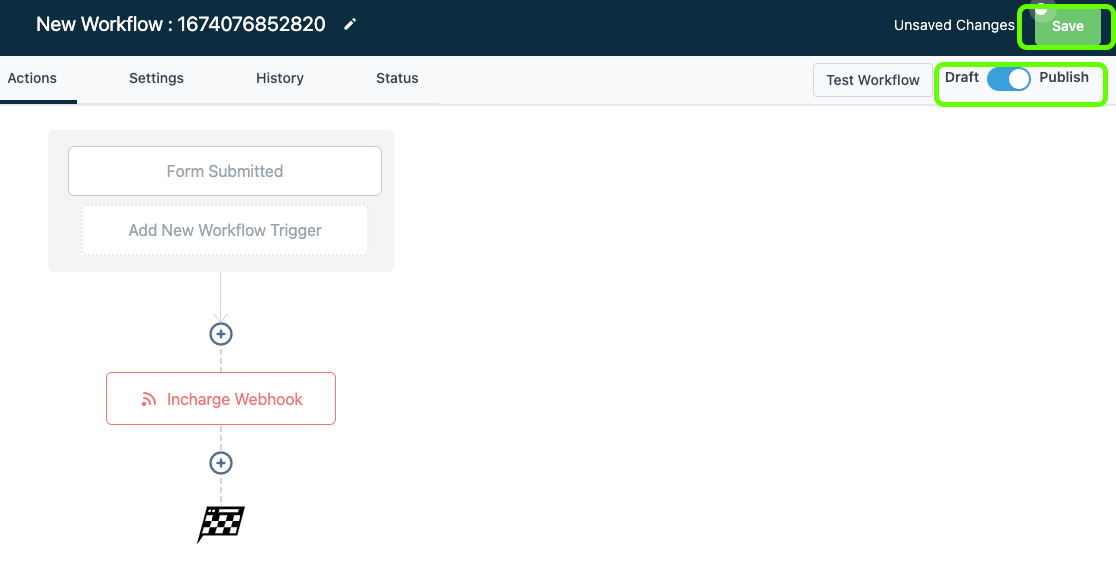
Step 18 : Click Save and Active the Automation
Step 19 : Verify your tracking installation was done correctly
Go to your website and refresh it a couple times, click to some pages, and submit a form
Go back to InCharge and click on the Tracking > Records Section
The records is the live feed of tracking data. If you see records populating, for the pages and webhook event then you have successfully set up the plugin.
Need support?:
Questions? Problems? Need more info? Contact InCharge Support for assistance!
Option 1: Live Chat Widget
Option 2: Ask the Facebook Community
Option 3: Email support@inchargeads.com


